Why 'My Mink Betty'?

Why 'My Mink Betty'?
I'm not your common, everyday twenty-something year old and when I graduated from High School I got an equally uncommon gift. My parents found for me a beautiful 1940's mink stole at a garage sale. It had belonged to the woman's Great Aunt Betty who had married late in life to a man with money and had only allowed him to buy her this one luxury. The unusually styled stole has the name, Betty L. Jones, embroidered in the satin lining so that's what I call her. They never had children of their own and the mink was passed to Aunt Betty's niece and on to her daughter. Until it got to me, no one since Aunt Betty had worn it. Now Betty the mink and I go to the theater together on special occasions and I hope that someday I can take her to the Symphony or the Ballet. Although Betty hadn't been worn or loved for many years she was waiting for someone to love her again as are most other things I look for when thrifting.

Showing posts with label Frugal Friday. Show all posts

Saturday, April 25, 2015

Ravelry Swap Reveal: Part Two, The Project Bag

I live close enough to one of the two Pendleton Woolen Mills (where Pendleton blankets and shirts are born) that I have driven past it countless times over the years on my way to church, friends' houses or estate sales.  For years I've wondered whether there was a factory store open to the public and what the hours would be.  One day, on my way to church, God sent me a sign.  Well actually, it was the factory sign that had apparently been there all along, just obscured by a grove of cottonwood trees.  Somebody cut down the trees, and I discovered the Mill Store.


Soon I stopped in and discovered that a decent variety of wool remnants could be found at reasonable prices.  Additionally, every cut fabric was 30% off, including remnants.  I wanted to do a project bag for the Ravelry swap, and after a very enjoyable time looking through all the goodies, I found three pieces I was sure would work.


I chose a solid piece in orange, and two coordinating plaids, one with a grey base, and one with a yellow base.  Each remnant was about a half yard of fabric.

I knew I wanted to make a Japanese Knot style bag, because this was going to be my first project ever sewn on a machine, and it doesn't require a zipper, drawstring or any other fastenings.  I found a pattern online and modified it to the size I wanted.  Then I set to work.

Unfortunately, being a novice at sewing, I didn't realize that working with wool brings it's own challenges.  The edges needed to be finished so they wouldn't ravel, and the weight of the fabric made it more difficult to manipulate and gather.  I also did not know that a Japanese Knot bag is a tricky pattern, no matter how straight forward it may seem.  Mom was confined to bed, so unable to help beyond giving advice, so I was on my own.  It was quite an adventure.   But I managed to pull it together just in time for shipping.


Here's the finished object.  I used the solid orange with the grey plaid for contrast. 


The lining is done in the grey plaid with an orange bottom, and the bag is fully reversible.  Even though the wool was a challenge for a novice to work with, it makes for a very sturdy bag, and I'm very pleased with the choice.  My swappee sews and she was very impressed.  Because she sews, I sent along the leftover material, including the majority of the yellow and orange plaid.


When I was practicing with the sewing machine, I made this little needle book, which I also sent.  Wool makes an excellent needle book.  Now that the sewing machine is set up again, maybe I can sew a make-up bag in less than 24 hours (sewing by hand isn't difficult, but it is time-consuming, lol).

Part Three of the Ravelry Swap Reveal is coming soon.
If you haven't seen Part One, it was mostly yarn.

I'm linking up with these parties:
Nifty Thrifty Sunday
Show and Share
Roses of Inspiration
Think Tank Thursday
Frugal Friday

Sunday, April 19, 2015

Ravelry Swap Reveal: Part One

For my crochet projects, I use Ravelry, a networking site for fiber arts, where one can find patterns for free or purchase, pattern help and yarn or notions venders.  They have a wide network of social forums and groups.  I am a member of a group specifically for swapping, and I just completed a swap. 

The theme for this swap was "Reduce, Reuse, Recycle."  This fit so well with things I like to do, such as thrifting, repurposing, and crafting, that I was able to fill a large Priority Mail flat rate box and stay well within my budget.  

 One of the requirements for the swaps that I do is to include at least one skein of yarn for my swappee to use.  I also like to send one item that I crocheted.  Mom likes to unravel or dismantle sweaters, and I help, so between the two of us, we were able to compile a good amount of yarn for this swap.
 

This 25c wool/angora/nylon J. Crew sweater


became a pair of fingerless mittens

and a lot of bulky weight yarn for my swappee to craft with.


The color in my picture is a little off; the yarn itself is a bit more mustard yellow.

I'm always on the lookout for a good white wool sweater that can be unraveled and dyed. 


So I pulled this one from my stash.  This was a 2XL woman's sweater, wool/nylon blend, that I picked up at Value Village for about $3.50.


First, Mom took out the seams, then she unraveled the sweater, resulting in about 2000 yards of sport weight yarn.


I used felted joins to make two skeins, 455 yards each, and then dyed them using Wilton Gel Color and vinegar to get a nice variegated orange colorway.  My swappee's favorite color is orange.  You can see I still have a little more than half the yarn left for another project. 

We learned how to unravel sweaters and reclaim the yarn from THIS website.


I've been cannibalizing jewelry for years, so I was able to put together a row counter bracelet and some stitch markers.  And there are the Tupperware measuring spoons I found back in February. 

These are just some of the things I was able to get into my swap box.  I'll show more soon.

I'm linking up with these parties:

Nifty Thrifty Sunday
Show and Share
Roses of Inspiration
Think Tank Thursday
Frugal Friday
Tips & Tricks
Bouquet of Talent

Thursday, February 19, 2015

A Simpler Way To Make Fire Starters

Today's post is written by my mom.

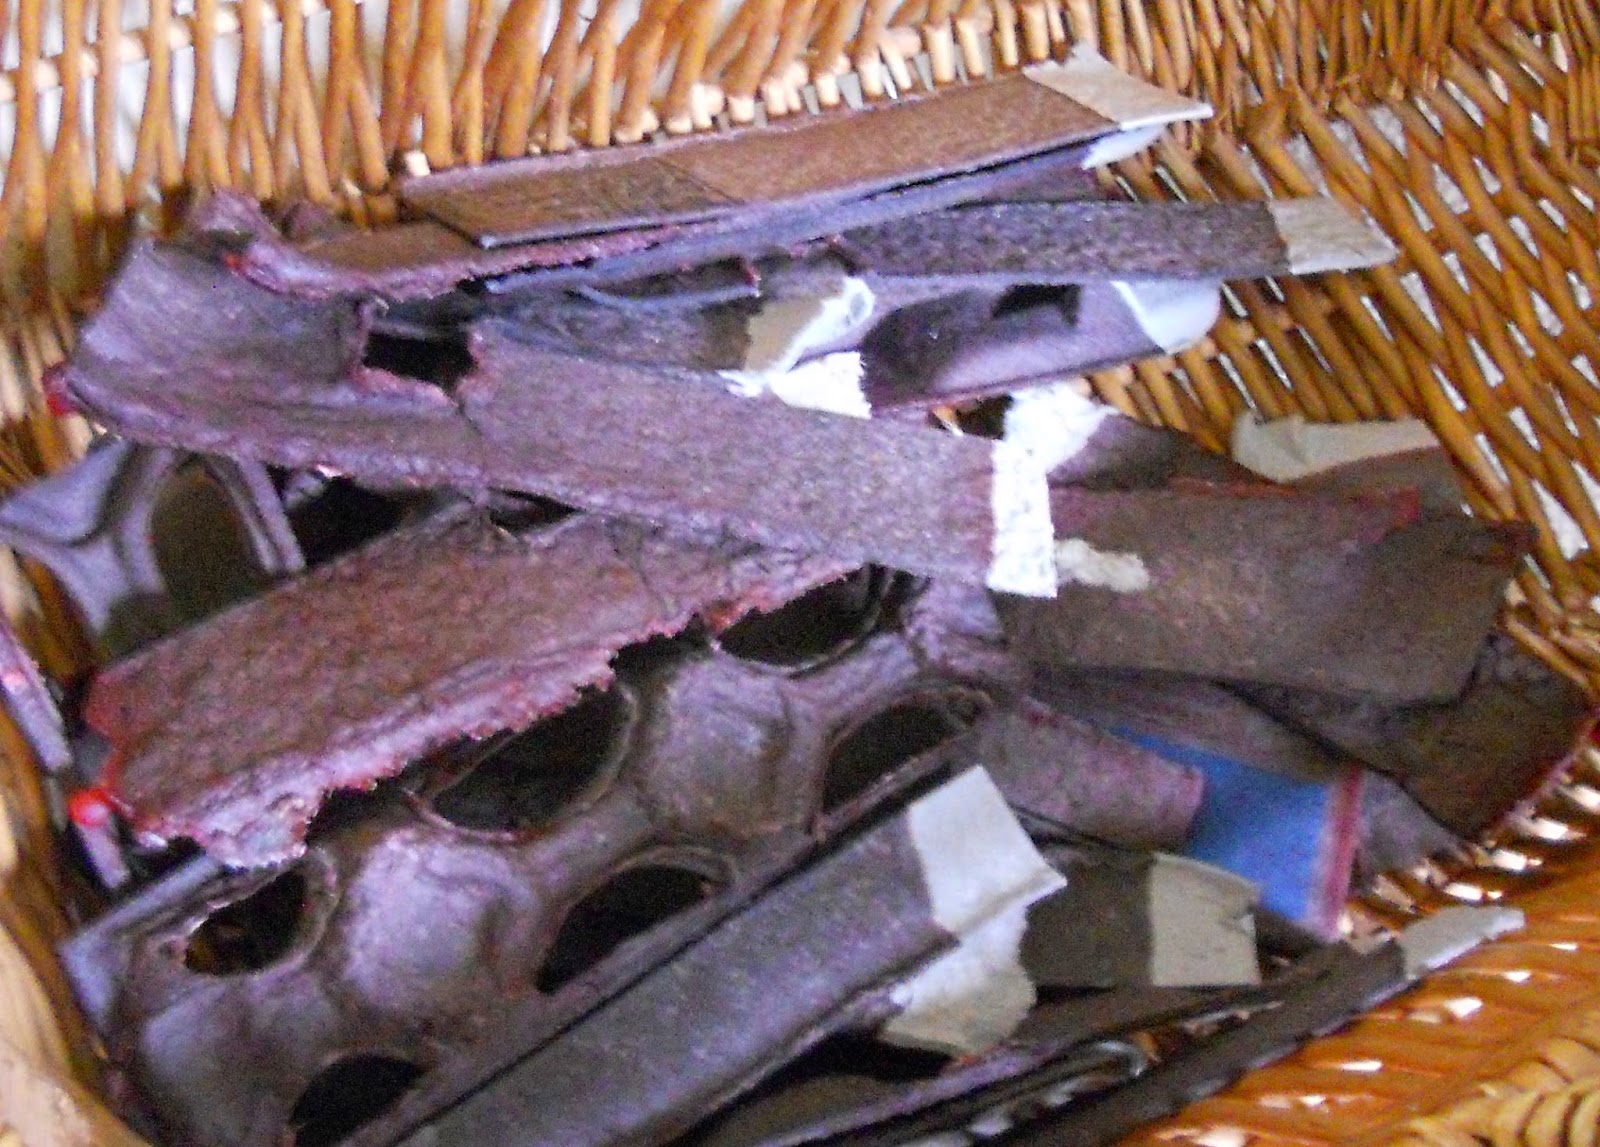
We use our fireplace insert to heat our house almost every day, so we build a lot of fires.  I used to make fire starters by mixing melted wax with sawdust and pressing it into the cups of egg cartons.  Those fire starters work very well.  But I have since found an easier way.  Whenever I made sawdust fire starters, I was left with the tops of dozens of egg cartons.  One day I decided to see if I could make fire starters out of the leftovers, and this is what I came up with.  

 
Fire Starter Strips

 They don't burn as long as the little sawdust cups, but they fit between logs and two of them are just enough to start a small pile of dry pine cones.  There are two giant pine trees in front of our house and I collect the cones when they drop and save them in paper bags in the woodshed until winter.  The cones make great kindling. 

The best thing about fire starter strips is that they are very easy to make.  Plus they are practically free.
If you think this kind of fire starter might work for you, I will try to tell you how to make them.
First you need a pot for melting wax.  You don't want to use one of your good cooking pots; you need a designated melting pot.  I bought this one at Goodwill because it was A) cheap and B) heavy. 


You can see it's got mineral residue and a bit of wax in it from multiple uses.  I never wash it.
Next you need a large can, the kind that held 2 lbs of something.  If you don't have one, I recommend buying a can of hominy. Hominy's good stuff.  You can use a smaller one, but I like this size better.  You are going to make a double boiler by putting the wax you want to melt into the can, putting the can into the pot and then putting water in the pot.  DO NOT TRY TO MELT WAX OVER DIRECT HEAT!


This is my can of premelted wax, left over from the last time I made fire starters. I got the wax by melting down some candles I bought at a garage sale.  I can usually get half-used pillars for 25c-50c each.  Once I got a grocery sack full of them for $1.00. 


Here are my tools: scissors, newspaper, an old oven mitt, and a canning jar lifter. 


In addition to the wax, you'll need a supply of cardboard egg cartons.  Cut off the closure strip and remove the lid. 


Cut up the top until you have a pile of strips like this.
 

Then cut the strips in half.  You should end up with an assortment of strips of cardboard about 5 inches long.


Lay some sheets of newspaper on the counter closest to the pot and set the bottom of your egg carton on the newspaper.  Make sure the newspaper covers the counter up to the stove, NOT like it is in the picture.


Fill the can with the wax chunks.  One reason I like using a big can is that a pillar candle will fit in it.  If you have a smaller can or a really big candle, cut to fit.  Put the can of wax into the pot and add water up to about one third the height of the can.   If the can starts to tip, you have added too much water.  Heat the pot on high until the water boils.  As the water heats up, the can will rattle a bit.  This is perfectly normal.


When the water in the pot has come to a full boil, turn the heat down to just below boiling and heat until all the wax is melted.  Keep adding wax until the can is about three-fourths full.  Resist the urge to touch the can.  It will get REALLY hot.  If you absolutely must touch it, use the oven mitt.  There is no need to stir the wax, just let it melt until it looks all shiny.  I usually test it by sticking one of the cardboard strips into the wax and trying to stir it.  If I meet any resistance, then there are still some unmelted chunks of wax. 


Once the wax is melted you can start dipping the cardboard strips.  Push each one in almost to the end.  You may need to let the strip bend a little to get it all in.  Then lift it out.  This part should go rather quickly.


Hold the strip over the can until the wax stops dripping - this takes maybe 5 seconds. 


Set the waxy strip into the bottom of the egg carton to dry. 


Here is the finished fire starter.  You can see I now have two cartons.  I cut up another one while I was waiting for the wax to melt.


Here are all the fire starters in their drying racks.  One egg carton yields about a dozen fire starters.


When you have finished dipping all your cardboard strips, CAREFULLY remove your can of wax from the pot of hot water and set it on a pile of newspaper to dry.  This is where the jar lifter comes in very handy.  You can do it with oven mitts, but they will probably get wax on them.  I could leave the can of wax in the pan to cool off, but that takes several hours, and I usually need the stove before that.  

Don't just put the water down the sink.  After it cools I sometimes line a strainer with paper towels and pour the water through that to catch any wax.  Or I might just dump it outside.

I timed myself doing this.  It took 20 minutes to go from empty pot to fully melted wax, but then only ten minutes to make all the fire starters and clean up.  The wax will harden on the strips very quickly.  They can be removed from the rack in a couple of minutes, making space for new ones, so you can do several batches rather quickly. 


We keep our fire starters in a basket next to the fireplace.  The end without the wax is the one to light.  Once I got the idea to dip both ends.  Not a good idea.  You need the bare end for it to light easily.  I also tried other kinds of cardboard: toilet paper rolls, soda boxes, corrugated strips.  None of them worked very well.  I think it is because the egg cartons absorb the wax better.

Has anyone noticed the irony?  I started making these because I had a bunch of leftover egg carton tops.  Now I have a bunch of leftover egg carton bottoms, lol.  I suppose I could become the egg carton caterpillar queen.  

I think I'll just recycle them.

One last note:  I don't have any little kids in my home.  I wouldn't melt wax with little kids about.  But I learned how to make fire starters from the Boy Scouts, so use your own judgement about how old your kid needs to be in order to help with this. 

Mom

I'm linking up with the following parties:

Friday, February 13, 2015

Happy Valentine's Day!

Happy Valentine's Day, everyone. 
 Here are some thoughts on love from 


I made a set of envelopes out of this book for a friend from church.


Then I made some cards, too.


Here are Calvin and his friend... er mortal enemy Susie Derkins.
 

Their relationship is um...


 complicated.


Fun fact: Susie Derkins was based on Bill Watterson's wife.


See how nicely the book pages


make into envelopes.

For my own valentines, I made envelopes out of some old sheet music.


A friend from ravelry sent me a nice pen, so I am sending her


some envelopes, note cards and seals.

Some of the envelopes were made using this


envelope punch board that Mom purchased from JoAnn on sale for about $13.00.  (They are having a big sale this weekend.  Check the website for coupons.)


Some were made with this homemade template.  Instructions for making your own are here.

I hope you all have a lovely Valentine's Day.


I'm linking to the following parties:


Sunday, February 8, 2015

Look What I Made - Notebooks!

I recently finished making some notebooks using thrifted items.

The first one I made as a gift for my friend Wendy.  I found a Little Golden Book version of "Peter Pan and Wendy" at a local thrift store, and cut it apart.  I started with the front cover,

 kept all the pages of the book


and mixed in plain paper pages

 
that I cut from copier paper.


Then I added the back cover

and bound the whole thing with wire.

Wendy was thrilled with it.  

This is the machine I used.

It is a Bind-It-All binding machine.  

Mom ordered it online from Wal-Mart around Christmas.  She saw a youtube video of someone using it to make a journal out of a vinyl record and was pretty impressed.  She couldn't find it for sale locally so she chose to order it from Wal-Mart because of their easy return policy.  We're still not sure if we are going to keep it.  I'll admit we've had some trouble mastering it; there's a bit of a learning curve, and $50 is too much to spend on a tool we're not super comfortable with.  But we're getting better at it, so we'll see.


I made another little notebook using a postcard I found at the Goodwill Outlet for a few pennies.

This postcard shows the Monsanto Hall of Chemistry, which was an exhibit in Disneyland from 1955 until 1966.  
"Where Creative Chemistry Works Wonders For You."
That's a pretty crazy slogan, concerning Monsanto is now known for bringing lawsuits against farmers for "stealing" Monsanto's patented GMO seed because pollen from the Monsanto plants drifted into the farmers' fields and pollinated their crops.

I just cut the card down the middle, making a front, 


and a back.  Then I added about 50 sheets of plain paper, and bound it at the top.  Sorry, I don't have a picture of the finished notebook.


Mom took my teen-aged niece to Goodwill to find something to make into a journal, and Niece picked out a set of  "Your Baby Can Read" sliding word cards.

They look something like this.

Here's the one she chose for the front cover.


She used graph paper from a composition book for the inside pages,
and the back cover is the "tongue" word card.

Next up will probably be a recipe notebook using something like
nuclear peaches


recipe comics
or

mmmm... pie.

We also have some VHS boxes to experiment with and we haven't tried the vinyl record yet.  So many possibilities...


I'm linking to the following parties:

Related Posts Plugin for WordPress, Blogger...